Showing posts with label furniture. Show all posts

Wednesday, July 20, 2011

Tips to Buying North Carolina Furniture

1. You can buy furniture, rugs and accessories from the stores on this website without coming to North Carolina. However, if you are planning to come to North Carolina remember to bring swatches or color samples of furniture, drapes, fabrics, paint or wallpaper that you will need to color match. If swatches aren't available, take good color pictures & bring them with you.


2. If you are buying furniture for a whole room or entire house, bring a floor plan of each room (include window, door & ceiling measurements) to help you select furniture with the correct dimensions. Measure other pieces of furniture in the room to ensure that your new furniture will be compatible in scale.

3. If necessary, take hall measurements, door measurements and ceiling measurements. If you are buying furniture that will go upstairs in a two or three story house, bring measurements of the hall and stairway so that you can make sure any furniture that you buy can be carried up your stairway.

4. Decide on the furniture style that you like. You can bring pictures of furniture that you like from your favorite home furnishings magazines.

5. With todays eclectic styles of decorating, many people use different types and finishes of wood in the same room. Select interesting pieces of furniture that complement each other and reflect your taste. If you have oriental and/or decorative rugs that you will be using, make certain that the fabric that you choose for upholstery will complement the colors and design of your rug.

6. To make small rooms look bigger, select furniture and accessories with colors that closely match the walls and floors. Also, reduce the number of pieces of furniture in the room and add reflective surfaces such as mirrors and glass-top tables.

7. To make a large room look smaller and more intimate, position furniture away from the wall and use taller pieces such as an entertainment center, armoire or screen. Use rugs, patterned upholstery fabrics and printed wallpaper to give the area a warm and more comfortable feeling.

8. When shopping for upholstered furniture, try to get the facts about the basic construction: springs, frames, padding, cushions and fabric. Always test furniture that will be used for seating by doing just that: sit on it! Consider how well the chair fits your particular body build. The height of the arms, the pitch of the back and the support under your knees should feel right for your body.

9. Be sure to wear comfortable shoes on your shopping trip.

Tuesday, July 19, 2011

Jepara carving: the legend who became the pride of the island of Java

Jepara carving art is sculpture that has the range and patterns are very unusual. beauty and diversity of relief carving patterns that no one could have made memalihkan gaze when looking at the sculpture.  Jepara carving sculpture of a difference with other regions, but the most famous in Indonesia today is Jepara carving.
LEGEND
Narrated an expert on sculpture and painting named Prabangkara who live in the UB from the King of Majapahit kingdom, at one time the king sent Prabangkara to make king consort of painting as an expression of his love for the queen who was very beautiful and fascinating.
Painting the empress without clothes that can be solved by Prabangkara perfectly and of course this makes King UB became suspicious because on certain body parts and secret there is a natural mark / special there are also the paintings and the place / position and shape exactly. By a ruse, Prabangkara with all the equipment disposed tied to a kite that after the laying-up in the sky cut the rope.
In these circumstances hover Prabangkara chisel fell in a village known as Rear Mountain near the town of Jepara. In a small village north of Jepara town until now indeed there are many high-quality carvers. But the origin of the carvings here whether it is correct due to the fall chisel Prabangkara, there are no historical data that supports it.
HISTORY
1. In the reign of Queen Kalinyamat, there was a vizier named Sungging Badarduwung derived from Campa (Cambodia) turned out to sculpt an expert as well. Now his Patih can still be seen at the Old Mosque and Mausoleum complex Kalinyamat Queen built in the XVI century.
2. The collapse of the Majapahit Kingdom has led to the spread of Hindu scholars and artists to various parts of the first half of XVI century. In the development, these artists continue to develop its expertise by adjusting the identity in the new area so that timbulah various regional motifs such as: Motive Majapahit, Bali, Mataram, Pajajaran, and expanding in Jepara Jepara until now.
Jepara carving art now is a very nice decoration to display in the house, either as pproperti and other home appliances, such as: doors, windows, tables, chairs and other.
Jepara carving art is sculpture that has the range and patterns are very unusual. beauty and diversity of relief carving patterns that no one could have made memalihkan gaze when looking at the sculpture. emiliki Jepara carving sculpture of a difference with other regions, but the most famous in Indonesia today is Jepara carving.
jepara-carving2
jepara-carving2
jepara-carving3
jepara-carving3
jepara-carving4
jepara-carving4
jepara-carving5
jepara-carving5
carved_bench_jepara-carving
soffa_jepara-carving

Tuesday, July 12, 2011

Wood Carving Center in Palembang Indonesia

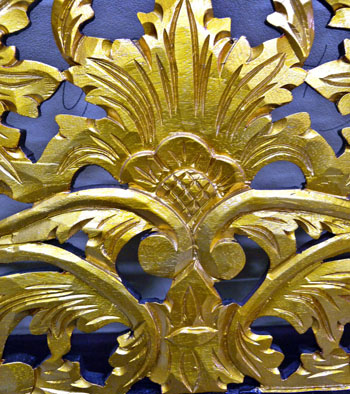
The wood carving center in Palembang is located on Faqih Jalaluddin Street, near the Palembang Grand Mosque.  Dozens of showrooms, which are also used to give finishing touches to wood carvings, are available in this city center.  Palembang wood carvings, which are identified by dark red and golden colors, are displayed along this street.

You can also find unfinished products, those which have not been softened or painted.  Workers in each shop usually give their final touch before sale.

Gold is the most dominant color in Palembang carvings.  It distinguishes Palembang carvings from carving products from other parts of Indonesia, such as Jepara in Central Java.
Cupboards bodies, doors, or glass, as well as picture frames are usually painted in gold color.  Other parts are covered by dark red and black colors.  Pictures of flowers in black make these carvings more beautiful.


Monday, July 11, 2011

Modern Bamboo Furniture


For you earth lovers who want to use bamboo materials for your household or furnitures but do not impressed by ethnic style, you can make it modern. Just combine the bamboo materials with modern representation, but how? Since the shape of bamboo that is circle?
Bamboo furniture usually made what it is, maybe only combined by rattan or rope fiber.  Now, fortunately, by the help of manufacture company, we can make it more than that, modern!

The manufacture company now can make bamboo board.  The innovation of bamboo furniture, usually to be bothered by the shape of bamboo, now can be varied in many ways.
You can combine iron as the frame of your chair and dining table.  The wide bamboo board really can be made as the table.  It is just that simple, just because of bamboo board.  Explore your design!

Thursday, May 5, 2011

Furnitue History (Part 1) : Tudor style furniture 1457 – 1509

This coincides with the rule of the Tudor dynasty in England whose first monarch was Henry VII. The term is often used more broadly to include Elizabeth I reign (1558 – 1603)
Characteristic of this style is the enrichment of every surface with flamboyant carved, turned, inlaid, and painted decoration in the spirit of the English Renaissance.
The Tudor period was one of beautiful woodwork, though it was still heavy and sparse by modern standards. Sideboards became fashionable as a way to display plate. The feather bed made an appearance, replacing the straw mattress.
Elaborate four poster beds were the mode.
Tudor furniture was made of oak or wood which was obtained locally, highly ornate, carved and heavy.

Chair


Bed

Chest
 

Table


Thursday, April 28, 2011

Indonesia Carving Motif

Jepara Carving Motif
The forms of leaf carving on this motif form a triangle and oblique. At each end there are usually leaves or fruits with flowers will form a circle. The form is not just a single circle, but the shape is more than one or terraced. The circle at the base of larger, more to the tip has narrowed. There is also going to flower or fruit in the form of a large circle surrounded by several smaller circles.

SHAPE MOTIF:

1. Of Leaves.
Principal leaf motif has its own style, which is dome-shaped and circular-niche. At the finish there are niches that gather leaves.

Principal form of dome-shaped leaf-carved this niche when sliced, incorporating a triangular prism.

2. Flower AND Fruit.
Flowers and fruit at this Jepara motif convex (rounded) as fruit wine or fruit Wuni arranged rows or clustered. This flower is often found on the corner of the meetings niche of the principal or there are leaves on the end niche surrounded by leaves, while the interest follows the shape of its leaves.

3. Fractions.
In the fractional leaf motif carvings have 3 pieces of lines that follow the direction of leaf shape, so it looks like a light.

4. Facts:
Carving Jepara motif is basically made most of the base or not so deep, often made on the basis of (invisibility), engraving is often called krawangan carving or engraving a glass insert. Jepara carving motif is often used to decorate your craft goods.

Bali Carving Motif
Bali motif is one type of traditional carving motifs that developed in the archipelago. This motif as well as other traditional motifs, closely related to the granting of royal names found in the region. Balinese motifs are carved motifs thought to be relics of kings or kingdoms that have progressed culture of that era. This Balinese motifs form graceful, rhythmic with a flexible style, grand and dignified, as if describing the personality of the king and his community.

Bali motif has several characteristics, which can be sorted into two kinds of characteristics of a general nature and of a special nature.

Common characteristics:
Bali motif carvings have all the forms of leaves, flowers and fruit in the form of convex and concave. It can be said that the motive of Bali is a mixture of motives that have a blend between the concave and convex shapes.

Special features:
1. Tweezers on Balinese motifs as well as on other motives, have the form of a loopy at the end.

2. This Sunggar motif found only in Bali alone. Sunggar form grows from the tip of the leaf curl benangan principal.

3. Endong on this motif of leaves that grow behind the principal leaves, like the ending contained in the motifs and motif Pejajaran Majapahit.

4. Simbar on Balinese motifs as found in the motifs and motif Pejajaran Majapahit with a distinctive shape as well. Simbar located in front of the base of the principal leaves the shape of the plot, so as to form a harmonious whole on this motif.

5. Trubus leaves that grow in this motif grows on the top of the dome-shaped leaves that form the principal curved gracefully.

6. Benangan in this motif form a special or unique. Benangannya partially convex and oblique. This Benangan grow circular until the end of the curls.

7. This fraction as well as on other motives, have broken the sweep line on the main leaf and broken cawen found on leaf carvings Patran, so as to increase harmony and beauty of carving shapes.

Mataram Carving Motif
Motif Mataram is a traditional carving motifs that developed and popular in the area of Java. Similar patterns and motifs Majapahit Bali which was closely related to the granting of royal names that ever existed in Java. This motif can also be viewed from two things: general characteristics and specific characteristics,

Common characteristics:
Motif Mataram has all the good leaf carvings form the main leaf and small leaf-shaped concave. The basin in terms of traditional carving called krawingan. The form of this motif carved leaf shaped leaves Patran, at the end there who have curly leaves and some are not loopy. Mataram composition of leaf motifs are usually clustered to resemble the natural leaf.

Special features:
1. Benangan motive is divided into 2 types, namely (a) benangan arise, and (b) benangan line.
2. Leaves Trubus in this motif is the most-shaped leaves form hunchback. Trubus leaves usually grow in the face benangan and stopped under the curly leaf, as if holding the leaf curl.
3. Fractions in Mataram most shaped motif cawen fractions. In addition there are also pieces of broken cawen lines contained on the interesting parts of this form of leaf motifs. A fraction of this motif does seem more varied than in other forms other motives.

Yogyakarta Carving Motif
Yogyakarta motif is a motif that uses a traditional Javanese kingdom that flourished in the region. Kingdom of Yogyakarta which still exist today, although now become one of the territory of the unitary Republic of Indonesia. Yogyakarta Kingdom is a continuation of the past glory of Islamic Mataram Kingdom with the result of a highly developed culture of art, whether it be carving, batik, ceramics or other cultural products. Yogya community character character represent the Java community in general is a high priority to the moral value of good manners, upload ungguh and cultural tolerance among others, mutual cooperation, mutual respect for fellow human beings that is quite thick in the order of daily life.
The motive of Yogyakarta is famous by the name of Yogya silver engraving. The form of this motif took a sample of the element of fern leaves. Principal leaf-carved niche berelung, graceful with convex and concave shapes of leaves that grow in these niches. At the end of this niche often grow flowers that bloom beautifully. Flowers that bloom provides a symbol of a young girl who is blossoming, blooming and also symbolizes the beginning of progress toward a higher progress. This indicates that a person must have high ideals to achieve a bright future.


Pajajaran Carving Motif
Features :
All forms of leaves starting from leaf carvings principal, Dunn shoot, leaf and fruit flower Patran etc. convex (rounded)

Special Features :
* Tweezers. Pajajaran motif has some tweezers ie
(1). Large tweezers on the main leaf
(2). Tweezers While the leaves are
(3). Small tweezers trubusan leaf.
* Horns. This motif shaped curved horns facing forward.
* Endong. Form of engraving that grow side by side / behind the main leaf
with curly contained in these final endong leaf carvings.
* Simbar. Having Simbar as the principal sweetener in the form of leaf carving
also typical.
* Benangan. Benangan in leaf carving poko shaped like a stalk arising
contained upfront principal leaf carvings, while there is a line benangan
in young leaf carvings.
* Fractions. Fractions line serves as a sweetener, the leaves spread on the principal
leaves and leaf fragments cawen in Patran and fractions on the carving leaf
another.


Majapahit Carving Motif
Feature – Special Feature :
* tweezers. Majapahit motif has tweezers and curls that are concave on
the top while at the end of the tweezers are curly as the end of the tweezers
them.
* Arrange Jambul. Crest stacking is characteristic contained in the motif majapahit
Crest apartments are located in advance in the main leaf.
* Leaves Trubus. Leaf flush in this motif grows mostly above the main leaf ..
* Simbar. shaped like Simbar that there is another motive. also functions
as an enhancer of beauty alone.
* Benangan. This motive is sometimes – sometimes have double benangan besides benangan
line.
* Fractions. like any other motive, the motive majapahit fractions have broken lines
which propagates in the principal leaves and broken cawen found on leaf carvings
Patran, which add beauty carving

Wednesday, April 27, 2011

How To Hand Sew

The simple technique shown here is one of the most versatile sewing methods that upholsters use. With it you can close pillows and cushions, make repairs, sew down outside arms and backs, and cover some of your goofs. You'll see other sewing methods where we install seats and so on, in later segments.

Here we're using a cushion stretcher, or cushion equalizer. It's adjustable and locks in place making our job much easier. You can also use upholsterers pins, or that expensive tool, the clothes pin. I'm using a 3 1/2" curved needle and nylon hand sewing twine for this job. I'll use black thread so you can see me working and also so you can see that when this done right, the thread doesn't show anyway (maybe they should teach this in medical school). For light weight fabrics use a thinner, smaller needle and thinner but strong sewing machine thread. Also, it's a good idea to have marked the center of the plates to help you keep them aligned.

Tie a knot in the end of the twine and thread needle. Start by going inside the pillow to the right so as to lap the sewing machine stitch. See above photo.


Next take about a 1/2" bite through the welt fabric, less for lighter weight fabric. Avoid going into the cord itself. Pull tight.


Hold your thread straight up and down to determine where your needle should enter the upper plate. Continue this method untill you've lapped the spot you sewed on your machine. If it looks as if the top plate, for example, is going to have more fabric than the bottom, then insert your needle a little to the left of normal on the top plate. This will help take up some of the slack.

When you're finished sewing wrap the twine around the needle a time or two and insert it into the pillow fabric or welt. Hold the thread snugly, close to the spot where the needle goes in. This will produce a knot which can stay inside the fabric keeping your work from coming loose. You'll usually hear a little popping sound when you successfully tug the knot into the right place. Cut off the excess twine.

How To Install a Zipper in a Pillow

Cut your zipper length about 1-2" from pillow plate corners. We use #4 aluminuim chain zipper. Put the slide on the proper end. Fold a piece of pillow fabric and sew far enough back across it to leave a small pocket to hide the zipper slide when the pillow is closed. Sew another fabric tab across the other end of the zipper.


Skip this step if your pillow has no welt. Center zipper piece to pillow plates. Start sewing at the plate's corner and the center of the fabric tab, expanding outward as you approach the zipper. Then sew as close as you can to both the zipper teeth and the welt cord. 


Next fold fabric 1/2" and top stitch the other pillow plate to the zipper. Try to cover at least half the zipper teeth. You shouldn't be able to see any of the zipper at this point. If you don't have welt cord on your project, sew both plates in the same manner. Back stitch or sew twice at the beginning and ending corners as you learned in "Cutting and Sewing Basics".


Try to use a thread color that blends with your fabric. The better you can hide the zipper the more you'll avoid the "why didn't you use a colored zipper?" complaint.

How to Make Pillows and Cushions

CUTTING AND SEWING BASICS;

Measure existing pillow with a tape measure, between the welts. The first measurement is up and down. Second is side to side. We'll be using 1/2" seams on most articles in our series, so, add 1" to your measurements to get the cut size. Figure the length of the welt cord. It can be 1 1/2-2" wide, it doesn't have to be exact. Cut the welt material on the bias, that is, diagonally. This will prevent "snaking" or twisting by making the welt fabric more flexible.

Notice the fabric we're using is railroaded, that is, the pattern is run up the roll. It doesn't matter much for a pillow or even a chair but if we were covering a sofa, this fabric could run the entire length of the inside back (IB), outside back (OB), or seat without having to be pieced.

Most upholstery weight fabrics are about 54" wide. We have a 60" wide table by 7' and use a 60" ruler. Most fabrics seem to come cut crooked, so use a framer's square to even out the beginning of the material. Mark with chalk and cut out the 2 fabric squares (plates). Put a"T" on the top so you won't get confused when you get to the sewing machine. Mark everything that you cut, (or you'll be sorry) even the backside of the welt.

Make sure both plates are the same size by laying them face to face and trim where nesassary. Due to the warp and woof properties of fabric they will often pull to one direction or the other even though you may have cut them exactly the same measurements. The plates have to be the same or the corners won't line up. Add a bow to the fabric (as in above photo). Start with about an 1/2" and taper off to nothing in about 4" or 5". See the scrap above the sissors. The bow makes up for the dip (like rabbit ears) that you would see in the filled pillow if cut straight across . Shape all four corners this way on a pillow that you're going to close by hand but not on the bottom of one that gets a zipper.

We use an industrial upholstery machine which features a walking foot and reverse. It takes large prewound bobbins which saves a lot of time. For most jobs we use #16 polyester top thread and bobbins. Three basic colors are necessary: black, white, and beaver (a neutral beige). It's good to have a spool of clear thread on hand, especially for top stitching when you don't have the right color.


Here's picture of a walking foot. This is a zipper foot which I use for most sewing jobs. I've ground the left side of it down a little so I get really close to the welt.


If your welt material is in more than one piece join them now with a 1/2" seam and back stitch or sew twice if necessary. We mostly use 5/32 jute welt cord. Fold the welt fabric around the cord and begin sewing either on the side or bottom of one plate. Never start, end or piece the welt fabric on the top of a pillow or front of a cushion. Use 1/2" seams. The seam (1/2") is the distance from where the needle enters the plate to the ouside of the plate. Get close to the welt, learn to feel for the cord inside with your finger tips. But be carefull, of course, of your fingers when sewing.


Two or three inches before the corners, stop, leaving the needle in the fabric to secure it, and make 3 cuts to help release the welt fabric to easily make the turn. Make one cut directly across from the plate corner and one before that point and one after. Again, stop sewing when your needle has come to the spot directly across from the plate corner, leave the needle in and lift the foot. Slightly crimp the welt as you turn the plate for the next side.

Finish off sewing the welt by butting the cord ends together and lapping the welt material at least 1/2" to 3/4". We leave no raw edges on any job with the sometimes exception of when we're using vinyl.


Be carefull to keep the seam even and close to the welt cord. If you'd like to have a zipper in your project then go now to, "How To Install A Zipper In A Pillow".


If you're going to hand sew your project, place the plate with the welt already sewn, on top of the second plate and line up the corners. Leave just enough space at the bottom to insert the filling. If you installed a zipper start at the corner and back stitch a few stitches. Sew on top of or just to the left of the the previous line of thread. Try sewing a pillow with contrasting thread to test yourself. The thread shouldn't show when you turn the pillow right side out. You can fill the pillow with a pre-made form of down or kapok or make your own . We make a cover of quilted polyester by stapling the sides and fill with leftover loose polyester from wrapping cushions. See, "How To Hand Sew" to finish off your pillow.

The Furnishing of an Eighteen Century Bed

by Bertram Chapman MBE, Chairman Albert E. Chapman Ltd
An elegant Flying Tester bed (Angel Bed) Circa 1730 from Raynham Hall in Norfolk came to us to be upholstered after careful restoration of the all the wood elements by Christopher Howe.
It was our task, under the auspices of English Heritage, to bring the bed back to its former glory, before its removal to the Georgian Wing of Hampton Court Palace.
Research into provenance for the bed was involved and not entirely conclusive as the following shows:
Raynham Hall Angel's Bed
The history of his bed is obscure but by scouring the Raynham Hall household accounts and searching for stylistic and archaeological evidence it has been possible to map out the following provenance.
Examination of the extensive and detailed household accounts and documents revealed no evidence beyond supposition that could be used, although there is much evidence related to beds between 1708 and 1777, but none actually mentioning the bed in question.
However, stylistic evidence played an important part in the research and through detailed searches it has been possible to piece together a credible history of the bed with strong pointers as to its origin. Although there are many state beds from the periods 1700-1720 and 1750-1800, there are few datable examples from the 1730s and 1740s, and the Raynham bed shares few features with the earlier beds. The closest, stylistically, is one at Leeds Castle, Kent which has the same cabriole finials at its feet, similar valance arms and the headboard must have originally had very similar 'organ pipes' (the central three headposts). Unfortunately there is no documentary evidence dating the Leeds bed exactly, but dates prior to 1720 have been suggested which run contrary to a Heals trade card for upholsterer William Tomkins which put the date after 1740.
Next, archaeological evidence was considered. Extensive investigation of the Raynham bed showed that timber elements were once covered with a painted cotton fabric which, for convenience has been termed 'chintz' and chintz was in vogue in England, particularly in the period 1700-1730.
Therefore the bed at Raynham Hall was covered in chintz and this is supported by reference to chintz having been used on a bed when two drapers were paid £3. 4s for calico and chintz for Lord Townshend's bed in 1740. This suggests that the work was 'repair' to an existing bed in the 'chintz bedchamber' originating before 1730 and this is the provenance that has been ascribed to the Angel Bed, which when brought for conservation and restoration by Bert Chapman bore a replacement cover of damask of no proven date. The decision was taken to cover the bed in new damask, but to retain some of the best of the old.
The following illustrates some of the procedures employed to bring the project to a successful conclusion.
The bed frameDescription of the different procedures used
Fig 1. The Angel Bed at Raynham Hall , Norfolk
The bed illustrated in Fig 1. consists of 36 separate elements, either slotted, tenoned, screwed or bolted together, each one of which is now covered with gold damask and mostly trimmed with braid.
The adhesive used to apply the damask was the first conundrum we had to solve. The use of rabbit skin size was abandoned because of doubts as to its effectiveness and its compatibility with the various fabric materials involved. We finally settled on a mixture of 90% of rye paste, Sandersons wallpaper paste which contained an anti fungicide and 10% of the water based Clam 2. This proved very effective provided it was spread lightly and evenly. The trick was to leave the applied damask to dry thoroughly before attempting any trimming of the edges, which was finally achieved using a scalpel - a very delicate and precise operation for one slip or false move could result in slashed fabric or at worst cut fingers and blood everywhere!
The Tester
Each of these areas is covered with damask both inside and out
Figure 2 The Tester
Tester supports, fig 2
Piece of damaskFig 3. Piece of the Damask furnishing the bed when brought to our attention
We retained this piece for the centre section of the tester and used new damask for the rest of the bed.


The Tester Support Brackets - Valance Arms
Top Section, Figure 4Figs 4 and 5 illustrate the two elements of each of the two support brackets. These essentially unsupported hanging brackets are most unusual. They 'hang' from the cornice frame and give form to the multi-layered fabric lower section valance which is some three times the height of the solid cornice above. The substantial construction of the 'valance' maintains its almost 'flying' form and contributes hugely to the elegant almost ethereal quality of the bed.
Fig 4. Top Section (left).   Fig 5. The bottom scroll (below)
Bottom Scroll
Leaf Crests
The photograph below shows the simple method of fixing the crests to the centre of each of the three sided cornice. Here three crests are pictured, the centre lying on its back.
Leaf Crests, Figure 6The crests have wood spigots which are mounted in slots or mortices in the cornice frame.


Leaf Crests, Reverse Figure 7This picture at Fig 7. shows the use of one piece of fabric to cover the small elements, such as crests, to avoid joins. The fullness on internal corners cut away.
These leaf crests are not seen from the reverse side therefore we were able glue down a 20mm turning on the back.


Pierced leaf fans
Pierced Leaf fans, Fig 8The pierced leaf fans are covered and braided. When the bed is assembled each fan sits on top of a bed head post.
It is essential that the appropriate width of braid is used to wrap the edges of the part. On beds of this type three widths of braid are generally required 15mm, 20mm and 25mm for the wide flat edge at the top of the cornice.
Shaped and carved head posts
Main headboard, Fig 10Leg Posts, Fig 9The pierced fans at Fig 8 stand on top of each head post (Fig 9. left) while the feet fit into cups in the headboard.
The three heavy central vertical wooden head posts (Fig 10. right) were changed, on advice from Peter Thornton curator of the Department of Woodwork at the V&A, to ones of laminated hessian.
These were much lighter in weight yet very rigid.
To make them we used, as a mould, one of the original semicircular wooden posts. Firstly a wrapping of thin plastic was placed around the post to prevent the successive layers of hessian sticking to the mould. Each layer of hessian was then coated with a layer of thick scotch glue which when dry was sanded down to a smooth finish before the next layer of hessian applied. The four layers of hessian had a final cover of calico before the damask was applied.
The three posts slot neatly into the recesses provided for them in the yoke at the top and the headboard below.
The Yoke
The three vertical headposts fit in recesses here
Figure 11 The Yoke
Below are shots of the bed, temporally erected in the workshop. This enabled us to decide on the correct proportions of the bed valances and the base valances coverlet and bolster.
The bed constructed in the workshopThe bed constructed in the workshop - further view
Below is a close up of the completed headboard.
Close up of the headboard
and finally, the completed bed in situ at Hampton Court Palace.
Completed bed in situ at Hampton Court Palace